Looking for a broader tool comparison? Read our guide to the best screenshot tools for Windows, including which options fit quick captures, annotation, documentation, sharing, and automation.
What is the ShareX image editor?
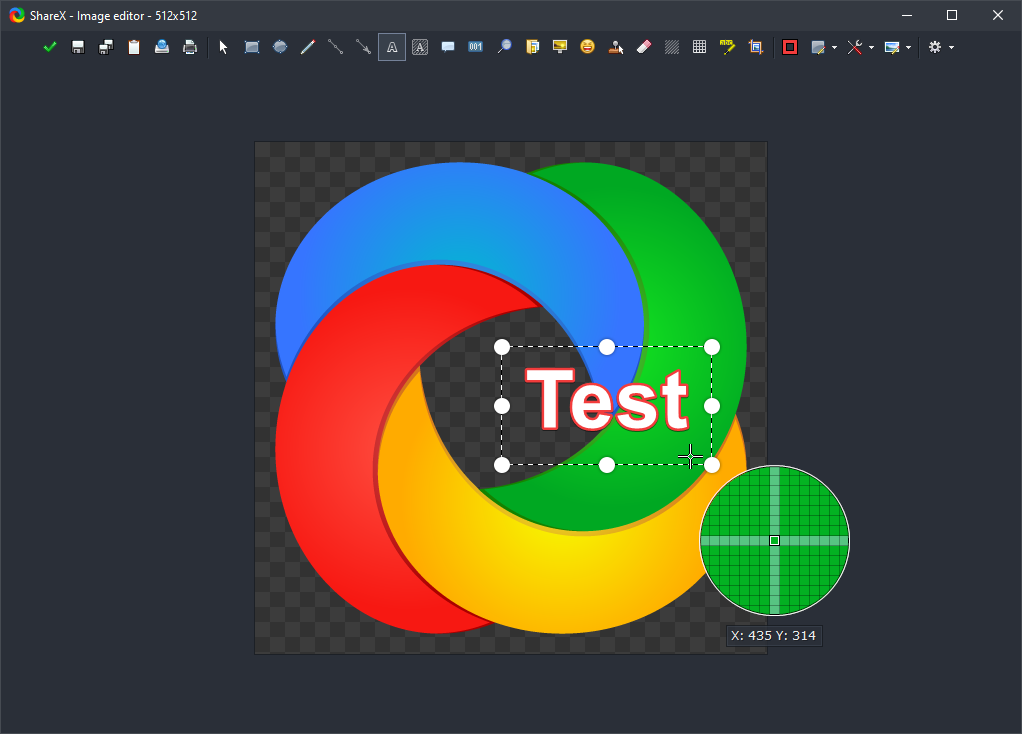
The ShareX image editor is a built-in screenshot annotation and image editing tool. It lets you annotate screenshots, hide sensitive information, crop images, add callouts, insert text, and prepare captures before they are copied, saved, uploaded, or passed to the next after-capture task.
The editor is commonly used for software tutorials, bug reports, documentation screenshots, support replies, and quick image edits where opening a separate graphics application would be unnecessary. Because it is integrated with ShareX capture workflows, you can take a screenshot, mark the important area, redact private details, and continue uploading or saving from the same window.
Legacy image editor
ShareX uses the modern image editor by default. If you prefer the old editor, enable it from Task settings -> Tools -> Use legacy image editor.
The first time you open the image editor, ShareX can also show an image editor selector. Choosing the legacy editor there saves the same preference.
Opening the image editor
You can open the image editor in several ways, depending on whether you want to edit a new capture, an existing file, or the last completed task.
- After capture tasks: Open the After capture tasks menu and enable Open in image editor. Every supported capture will open in the image editor before the remaining after-capture tasks continue.
- Quick task menu: If you use the quick task menu after capture, choose a task that includes Annotate.
- Tools menu: Open Tools -> Image editor to start the editor manually. If no image is supplied, the editor opens its startup flow so you can choose or create an image.
- Hotkey: Create or edit a hotkey and set its task to Tools -> Image editor. If the hotkey is run with a file path, ShareX opens that image; otherwise it opens the editor startup flow.
- Main window task list: Right-click an image task in the main window and select Edit image.
- Main window thumbnail action: If thumbnail click actions are configured to Edit image, clicking the thumbnail of an image task opens it in the editor.
- Task notification: Middle-click the task-completed notification in the lower-right corner. The default middle-click action is Annotate image. This can be changed under Task settings -> General -> notification click actions.
- History windows: Open History or Image history, select an image item, and use the edit image action.
- Windows Explorer context menu: If ShareX shell integration is enabled, right-click an image file in Explorer and choose Edit with ShareX.
- Command line: Run ShareX with
-ImageEditor "path\to\image.png"to open a specific image in the editor.
When the editor is opened as an after-capture task, Enter continues the task with your edits. Esc cancels the task. The bottom toolbar also contains buttons to continue, cancel, copy, save, save as, pin to screen, and upload.
Basic editing workflow
A typical screenshot editing workflow in ShareX is:
- Capture a screenshot using any ShareX capture method.
- Open the screenshot in the image editor automatically or manually.
- Add annotations such as arrows, rectangles, text, highlights, step numbers, or speech balloons.
- Hide private information with blur, pixelate, smart eraser, crop, or cut out.
- Review the result, then copy, save, upload, pin, or continue the configured after-capture tasks.
Annotations stay editable until they are flattened or the final image is produced. This means you can select an existing annotation, move it, resize it, change its color, adjust its thickness, duplicate it, delete it, or reorder it before finishing the edit.
Editing screenshots for documentation
For tutorial images and documentation screenshots, use a small number of clear annotations instead of marking everything at once. Arrows are useful for pointing to exact controls, rectangles and ellipses work well for larger interface areas, and the Step tool is useful when a screenshot needs to show a sequence of actions.
Text and speech balloons can explain context directly inside the image. Keep the text short enough that it remains readable after the image is resized on a website, in a help article, or in a support ticket. If the screenshot will be uploaded publicly, check names, email addresses, file paths, access tokens, private URLs, and account details before continuing.
Redacting sensitive information
ShareX includes several tools for hiding private data in screenshots:
- Blur softens a selected area and is useful for quickly obscuring readable text.
- Pixelate replaces details with large blocks, making the redaction more visually obvious.
- Smart Eraser paints over small details by blending with nearby colors.
- Crop removes everything outside the selected area.
- Cut Out removes unneeded horizontal or vertical space from the middle of an image.
For highly sensitive information, cropping it out of the screenshot is usually safer than only covering it visually. After redacting, zoom in and inspect the edited area before uploading or sharing the image.
Annotation tools
Select
Select and move existing annotations. After selecting an annotation, you can move it with the mouse or arrow keys, duplicate it, delete it, change its layer order, or adjust the available tool options in the bottom toolbar.
Rectangle
Draw a rectangular outline or filled rectangle. Rectangle options include border color, fill color, thickness, corner radius, and other shared shape settings.
Ellipse
Draw an ellipse or circle. Use it for oval callouts, circular highlights, and filled or outlined markers.
Line
Draw a straight line between two points. Hold Shift while drawing to snap the line angle to 45-degree increments.
Arrow
Draw an arrow between two points. Arrows use the selected color and thickness and can be moved or resized after creation.
Freehand
Draw freehand strokes with the selected color and thickness. This is useful for circling, underlining, or quickly marking parts of an image.
Text
Insert editable text. Text options include text color, outline color, font size, bold, italic, and underline.
Speech Balloon
Draw a speech balloon with text inside it. The balloon supports border color, fill color, text color, font size, thickness, and corner radius.
Step
Place auto-incrementing numbered markers. Use this for step-by-step screenshots where each marker identifies an action or area.
Image
Insert another image as an annotation. You can also paste or drag image files into the editor.
Emoji
Insert an emoji as an annotation. Use it when you want a quick visual marker, reaction, or decorative symbol without importing an image file manually.
Cursor
Insert a cursor graphic as an annotation. This is useful for tutorial screenshots where you want to show where the pointer should be, even if the cursor was not captured or needs to be placed more clearly.
Highlight
Draw a translucent highlight region. It is useful for emphasizing text or UI areas without fully covering the underlying image.
Smart Eraser
Paint over an area using a sampled nearby color. This is useful for quickly hiding text or small details while blending into the surrounding image.
Blur
Blur a selected rectangular area. Use it to hide sensitive information such as names, email addresses, tokens, or account details.
Pixelate
Pixelate a selected rectangular area. Pixelation is another way to obscure sensitive information while making it obvious that the area was redacted.
Magnify
Create a magnified region. Use it to enlarge small UI details while keeping them in context inside the screenshot.
Spotlight
Darken the image outside a selected area. This draws attention to one part of the screenshot without cropping away the rest.
Crop
Crop the image to a selected area. The crop overlay can be moved or resized before confirming.
Cut Out
Remove a horizontal or vertical strip from the image and join the remaining parts. This is useful for shortening tall or wide screenshots by removing irrelevant space.
Background tools
The image editor also includes background tools for preparing screenshots that need extra spacing or presentation styling. These options can add margin, padding, smart padding, rounded corners, shadows, aspect ratio adjustments, and custom backgrounds.
Backgrounds can be transparent, solid colors, gradients, images, or wallpapers depending on the selected option. These tools are useful when creating polished screenshots for release notes, social posts, documentation, comparison images, and website content.
Image effects
Image effects can be used when the whole image needs visual adjustment rather than a single annotation. Effects are grouped into categories such as manipulations, adjustments, filters, and drawings. Use them for quick changes such as improving contrast, changing colors, applying filters, or preparing an image for a specific visual style.
For documentation and support screenshots, keep effects minimal so the image still represents the real interface accurately.
Editor options
The editor options are available from the File menu. Options can control the editor appearance, behavior, and task integration:
- Follow system theme and Theme control whether the editor uses the system theme or a selected theme.
- Follow system accent color and Accent color control the editor accent color.
- Remember window state restores the previous editor window position and size.
- Show exit confirmation asks before closing when there may be unsaved work.
- Zoom to fit on open fits the image into the editor view when it opens.
- Quick crop makes cropping faster for users who frequently trim screenshots.
- Auto close editor on task closes the editor after using a task action.
- Auto copy image to clipboard copies the result automatically.
- Show insert image dialog controls whether ShareX asks how pasted or dropped images should be inserted.
Saving, copying, and uploading
The bottom toolbar is used to finish the edit. You can continue the current after-capture workflow, cancel the task, copy the edited image to the clipboard, save it, save it as a new file, pin it to the screen, print it, or upload it using the configured ShareX upload destinations.
If the editor was opened from an after-capture task, continuing applies the edit before later tasks run. For example, a capture workflow can open the editor first, then copy the edited image, save it to disk, upload it, or perform other configured actions.
Tips for better screenshot annotations
- Use high-contrast colors for arrows, rectangles, and text so annotations are readable on both light and dark interfaces.
- Use Step markers when the viewer must follow actions in a specific order.
- Use Highlight or Spotlight when you want to guide attention without covering the original content.
- Use Magnify for small buttons, icons, or text that would be hard to read at normal screenshot size.
- Keep redactions consistent across the screenshot so private information is not missed.
- Flatten annotations only when you are ready to make them part of the image.
Keybinds
Common
| Keybind | Description |
|---|---|
| Delete | Delete selected annotation |
| Shift + Delete | Delete all annotations |
| Ctrl + Z | Undo |
| Ctrl + Y | Redo |
| Ctrl + Shift + Z | Redo |
| Ctrl + X | Cut selected annotation |
| Ctrl + C | Copy selected annotation |
| Ctrl + V | Paste annotation, image, or supported clipboard content |
| Ctrl + D | Duplicate selected annotation |
| Ctrl + Shift + F | Flatten annotations into the image |
| Arrow keys | Move selected annotation by 1 px |
| Shift + Arrow keys | Move selected annotation by 10 px |
| Home | Bring selected annotation to front |
| Page up | Bring selected annotation forward |
| Page down | Send selected annotation backward |
| End | Send selected annotation to back |
| Right click | Open the editor context menu |
| Esc | Cancel active crop, clear current selection, or cancel the editor task |
Editor actions
| Keybind | Description |
|---|---|
| Enter | Continue / run after-capture tasks with changes applied |
| Esc | Cancel |
| Ctrl + Shift + C | Copy image to clipboard |
| Ctrl + S | Save image |
| Ctrl + Shift + S | Save image as… |
| Ctrl + P | Pin image to screen |
| Ctrl + Shift + P | Print image |
| Ctrl + U | Upload image |
View controls
| Keybind | Description |
|---|---|
| Hold middle click | Pan image |
| Ctrl + Mouse wheel | Zoom centered on cursor |
| Zoom picker | Choose a preset zoom level |
| Zoom picker -> Fit | Zoom to fit |
Tools
| Keybind | Description |
|---|---|
| V | Select |
| R | Rectangle |
| E | Ellipse |
| L | Line |
| A | Arrow |
| F | Freehand |
| T | Text |
| O | Speech Balloon |
| N | Step |
| I | Image |
| J | Emoji |
| K | Cursor |
| H | Highlight |
| W | Smart Eraser |
| B | Blur |
| P | Pixelate |
| M | Magnify |
| S | Spotlight |
| C | Crop |
| U | Cut Out |
While drawing or editing
| Keybind | Description |
|---|---|
| Shift while drawing line or arrow | Snap angle to 45-degree increments |
| Enter while crop is active | Confirm crop |
| Double left click inside crop area | Confirm crop |
| Right click while crop is active | Cancel crop |
| Right click while drawing crop or cut out | Cancel active region drawing |
Right-click context menu
| Keybind | Description |
|---|---|
| Ctrl + Z | Undo |
| Ctrl + Y | Redo |
| Delete | Delete |
| Shift + Delete | Delete all |
| Ctrl + Shift + F | Flatten |
| Ctrl + X | Cut |
| Ctrl + C | Copy |
| Ctrl + V | Paste |
| Ctrl + D | Duplicate |
| Home | Bring to front |
| Page up | Bring forward |
| Page down | Send backward |
| End | Send to back |
Bottom task menu
| Keybind | Description |
|---|---|
| Enter | Continue / run after-capture tasks |
| Esc | Cancel |
| Ctrl + Shift + C | Copy image to clipboard |
| Ctrl + S | Save image |
| Ctrl + Shift + S | Save image as… |
| Ctrl + P | Pin image to screen |
| Ctrl + Shift + P | Print image |
| Ctrl + U | Upload image |